• Skip to main content
  • Skip to primary sidebar

Mad AlcheMead

Experiments in Brewing

  • What is Mead?
    • What is Mead?
    • What does Mead taste like?
    • History of Mead
    • The Mead of Poetry
    • Honey: What makes the Mead
    • Is Mead Gluten Free (and other Drinks)?
  • How To Make Mead
    • How do I Make Mead? (Beginner)
    • How do I Make Mead? (Intermediate)
    • Mead Making Equipment Guide
    • How to deal with a Stuck Fermentation
    • Is my Mead Infected?
    • How to Back Sweeten Mead
    • How much Spice to put in Mead?
    • Oaking your Mead
    • How to Clear Mead
    • How to Filter Mead
    • How to Keg Mead
    • How to Bottle your Mead
    • Clean and Sanitize Mead Brewing Equipment
  • Brew Logs/Recipes
  • Reviews
  • Articles

Mead Recipes

Brew Log: Vanilla Peach Mead

February 2, 2019 by The Mad AlcheMeadist

This was one of the first meads I tried to make, but has been the most troublesome for me. Unfortunately, my notes for this one are pretty sparse, so my measurements aren’t going to be exact. Luckily, the biggest issue with the flavor of this mead had more to do with my preparation of the ingredients, rather than their quantity.

Ingredients

  • ~ 12 lbs Clover honey
  • 12-15 lbs fresh peaches
  • 1 lb Lactose (in secondary)
  • 2 tbsp vanilla extract (in secondary)
  • 1 oz light toast American oak cubes

Instructions

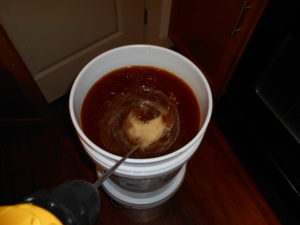
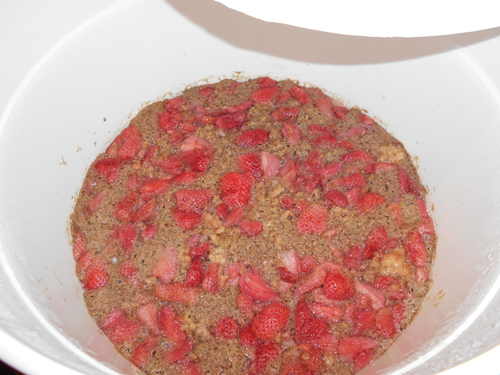
Place your honey and water in your brewing bucket. Pitch your yeast. Add whatever nutrients you usually use. Cut up AND SKIN your peaches, place them in a muslin bag and soak this in your mead for a few weeks. Make sure to move it around and give it an occasional squish to make sure you push out all the sugars and flavoring. You may want to add some Pectin to your mead along with the peaches to help prevent it from getting hazy as it can often do with fruits – peaches are a major culprit of this.

After primary is finished, rack your mead and add the vanilla and lactose. I’m not sure he oak really came across in that amount, so add to your tastes if desired. The vanilla is also rather subtle in this, so feel free to add more if you’re wanting it to be more prominent.

Difficulties

vanilla peach mead in bottle

This mead fermented just fine. It was quick and vigorous. However, when it was done, the taste was quite astringent. When I had cut up all the peaches for this (and placed in a muslin bag for a few weeks), I had left the skins on. It turns out peach skins can be leave quite a bitter taste in mead. I’ve seen recommendations for leaving some skins in when brewing beer; however, I think the quantity I used and the more delicate flavor profile of this mead compared to a heavily bodied beer made it too prominent. This mead also had a thinner body than I was wanting from it, so I had a lot of tweaks I wanted to make to it.

Initially I had hoped a bit of aging might mellow this out. But it didn’t seem to have much effect. I then tried adding a few oak cubes, hoping it would bulk up the body a tad, which it may have but not very noticeably in the amount that I had used. It was my first foray into oaking and I didn’t want to overdo it, as this was already shaky grounds. To further bulk up the body I added a pound of lactose, to give it a creamier texture and sweeten it up a bit. I was aiming for something like peaches and cream, conceptually.

Finally I added some vanilla. This probably did the most to take the edge off the astringency. I think I finally got it to a palatable place. Over two years after I started it.

Filed Under: Mead Recipes

Brew Log: Mojito Mead

December 16, 2018 by The Mad AlcheMeadist

This brew began its life as part of a four gallon plain mead that I made so I could split it into 4 separate one gallon flavors. I started with 7.75 pounds of honey, which got divvied up after fermentation had completed, so the numbers might be a bit odd.

Ingredients – Primary

  • 1.9375 lbs. Wildflower honey
  • Water to 1 gallon
  • Yeast Nutrients – Staggered Addition

Ingredients – Secondary

  • 1 cup Key Lime juice
  • Several tablespoons of Mint tincture (mint leaves soaked in vodka)

Original Gravity: 1.056

Final Gravity: 0.992

ABV: Approximately 8.4%

A tip on making the tincture, don’t use the bottom shelf vodka. While it should age out over time, it adds a very strong “hot” alcohol nose and taste that will overpower most of the nice flavor and taste you’ve been cultivating. It lead me to not including as much of the tincture as I could have, which lead to a much more subtle mint flavor than I would have preferred. 

Luckily, the lime came through nicely. It has a nice, refreshing, fruity flavor. And the hint of lime makes an appearance in the finish. It makes for a great summery drink. Definitely one I’ll be revisiting. 

Filed Under: Mead Recipes

Brew Log: Eucalyptus Mead

October 13, 2018 by The Mad AlcheMeadist


During a trip to a renaissance fair, I happened upon a honey vendor from the area selling varietal honeys of all sorts. One that stuck out to me was one made from the pollen of Eucalyptus plants. Eucalyptus Honey
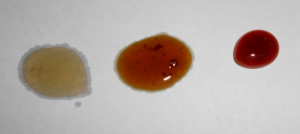
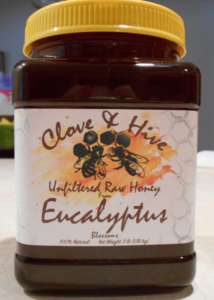
The honey itself was on the dark side, and border-line brown colored. It was sweet and had a hint of that menthol-esque flavor Eucalyptus is known for. If you’re not located near a medieval honey vendor, Eucalyptus honey is available online.

Now, I’ve read mixed things online about using Eucalyptus in mead. Some sources saying that the menthol becomes quite overpowering and it ends up tasting like medicine, and other have stated that as long as you find the honey palatable, the mead should turn out fine. To add to the confusion, it turns out there is something like 200+ different strains of the plant, so some may be more suited for the purpose than others.

Fermenting mead - 1 gallon 
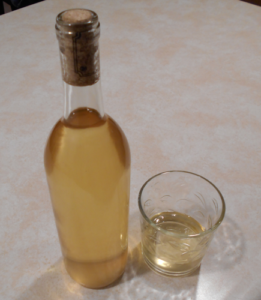
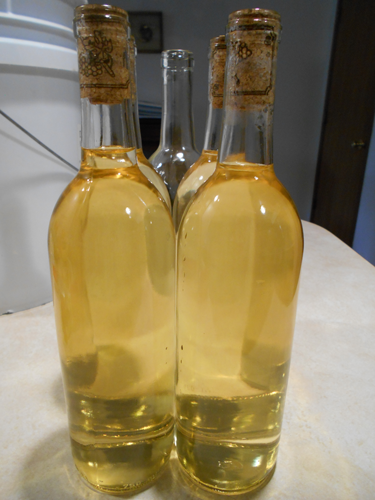
So I picked up a jug of the honey, roughly 3 pounds worth, just enough for a gallon experimental brew. I didn’t do anything fancy with this one. Mixed in the water and honey, used D47 yeast and let it ferment for the next couple of weeks. It started to clear a lot quicker than I expected, and created a nice pale straw colored liquid when it was all done with.

I was quite happy with the result. No vile medicinal taste from this, which puts me firmly in the second camp of: if the honey is palatable, the mead should be fine. The mead turned out to be of a nice sweetness, with a bit of a tang or spiciness towards the finish. The slight hint of the menthol appears as more of an aftertaste. I didn’t measure the gravitates on this one, but it has a decent kick to it. I hope my experience with this batch has lessened some of the hesitance to use this honey varietal. It is a fairly unique flavor that should be experienced.
The almost 5 bottles of Eucalyptus mead

Filed Under: Mead Recipes

Brew Log: Bochet

July 9, 2017 by The Mad AlcheMeadist

A bochet is a type of mead that is made by first cooking the honey until it is caramelized. The process of burning or cooking the honey darkens and thickens it significantly. The longer it is cooked, the darker the honey gets and the more intense the new flavors become. The honey takes on a significantly more toffee or caramel flavor. This is one mead you wouldn’t want to use a special honey varietal in, as the cooking will completely overpower it. Many meadmakers don’t feel bad about using a cheaper store bought honey for these, as all the flavor comes from the process.

burnt honey comparison
Initial color, medium length cook, longer length cook color comparison.

The mead that results from this process will be a dark amber color and has a very deep and complex flavor. However, this method tends to require a lot of aging time in order to bring out its full potential. Especially since this style tends to forgo any additional flavorings. While some people will add fruit or spices to their bochets, there are many purists that prefer to keep these as a traditional. For this reason, be sure to have extra nutrients during your ferment, as there will be no fruit to assist with nutrients for the yeast to make use of, and they will already have their work cut out for them with this thicker, dense honey to chew through.

Caramelizing Honey

The process of cooking the honey requires a fair amount of time and attention, as well as care. Note that nearly boiling honey needs to be treated with caution. If it spatters or spills and gets on you, it will cling to you and continue burning. Also, note: you will need a very large pot to cook your honey in. Honey likes to expand a lot – roughly double its volume – when it is being heated. There’s actually two methods available to us to caramelize. The first is in a pot on the stove. Cooking the honey this way will take over an hour of nearly constant stirring, so make sure to block out a significant amount of time. You can gauge how far along into the process you get with how dark the honey has gotten. I put a drip on a card at the beginning, partway in, and then after I decided to add a big more time to it to compare the differences.

cooking honey in a crockpot

The second method of caramelizing is a bit easier, and the one I used, although it takes significantly longer. You can actually do this in a crock-pot. I filled a 1.25 gallon crock-pot roughly ⅓ full of honey and then cooked it on low. You won’t see much activity until after hour 3. Hour 4-5 is when the darkening really begins to happen  After that point, the timing is up to you, but you should increase the frequency of how often you check the honey’s progress.

I would advise against leaving this unattended, or running it overnight while you sleep. Even at ⅓ full, and with the lid on, After hour 4, I had the honey expand enough to somehow get spattering outside of the lid and onto the floor. I stopped mine after 5 hours, but the next day decided to run it for another 2 to continue darkening it slightly. A lot of that second runs’ time was spent getting the honey up to the temp where it could darken though. Make sure to scrape along the sides on occasion to make sure the honey is heating evenly, and it’s not just crystallizing chunks on the side.

Pitching your Bochet must

Mixing bochet - deep toffee color

The best part of making a bochet is the smell. My place smelled like delicious honey/toffee for a solid two weeks after doing this. You’d eventually get used to it, then re enter the place later and get hit with that smell again.

After your honey is the desired color, you’ll have to move it to your fermenting vessel. Then add in your water, and mix thoroughly It will be quite thick, so help your yeast out and make it as homogeneous as you can. Remember the nutrients. Mine had a slow start, as it had a pretty high original gravity. I didn’t see airlock activity until 2 days after pitching the yeast. Even now it is not a super vigorous fermentation like fruit tends to be.

Mixing it, the must had an appearance of thick chocolate milk.The kind that Augustus Gloop tried to go swimming in. I’m really excited to see how this one turns out. I have 4 gallons on its way.

Brew Log: Bochet

I decided to do a slightly larger batch for this one than my 1 gallon experimental brews. This is a 4 gallon recipe.

Ingredients – Primary

  • 8 lbs of Wildflower honey, caramelized
  • Water to fill to 4 gallons.
  • Lavlin 71B

Original Gravity: 1.042

Make sure to mix this one thoroughly and frequently in the beginning stages. You can tend to get away with being less attentive with other meads, especially with fruit additives. But this one requires some attention. The thickness of the honey after caramelizing made it difficult to dissolve fully. On top of that, the initial bubbling from the fermentation caused it to push up some of that viscous liquid and form a rigid layer on top of the must. This caused to to look like the fermentation hadn’t started yet, if you were just checking for airlock activity. It could also cause a buildup underneath the surface that could push it up and out of the airlock if left unbroken.

It is also good practice to keep this one aerated in the beginning, as this will assist the yeast with their reproduction. Given the lack of nutrients within the mead itself (but you should be adding some), the yeast will need all the assistance they can get. You don’t want to stress them too much with this environment, as that can lead to some off flavors. If their metabolism isn’t working in the most efficient manner, they may not be processing the sugars into the kind of alcohol we want.

Filed Under: Mead Recipes

Brew Log: Strawberry Mead

May 13, 2017 by The Mad AlcheMeadist

It is now strawberry season, here. So walking around the farmer’s market I had the urge to try to brew a strawberry mead recipe. I picked up a flat (8 quarts) of strawberries. After removing the stems, I quartered them and split them into 3 large freezer bags. I also added a squirt of lemon juice to keep them fresh while I was cutting them. Then I threw them in the freezer to help break down the fruits’ cell walls. Then thawed one for the primary. This allows for the flavor to be extracted more efficiently.


Ingredients – Primary

  • 9 lbs. Wildflower honey
  • ~3.5-4 lbs. Strawberries
  • 5 Bananas
  • Yeast Nutrients – Staggered Addition

Ingredients Secondary

  • ~7-8 lbs. Strawberries
  • There will probably be some backsweetening, but it’s still in primary. TBD

Original Gravity: 1.044

Potential ABV: Approximately 6%

Strawberries surrounded by krausen

So the gravity may be a bit inaccurate due to the sugars in the fruit not being fully diffused into the liquid when I took the measurement. But I’m just looking for a ballpark figure.

You may be wondering why the bananas. I’ve read they work as a very good compliment to the strawberry flavor. Strawberry is a tough one, as it is very light. Even eating the fruit itself, its mostly an after taste. On top of the flavor compliment, bananas are also supposed to impart a good amount of mouthfeel to the drink. I am excited to see how this turns out. Mouthfeel seems to be the biggest sticking point for a lot of my batches. They are all a bit thinner feeling than I’d like them to be. I’d suggest using a brew bag for the bananas, at the very least. The first few I added, I had forgotten to put them in one, and they essentially melted. So there will be a lot of sediment at the bottom of my container when this is done.

Important Note:

If you are attempting a strawberry melomel recipe, and are using a carboy, you will want to use a blow off tube instead of a regular airlock. Strawberry is known to be promote quite a vigorous fermentation. Wider buckets shouldn’t have much of an issue if there is plenty of head space, but it might not be a bad idea anyway. I went light on the strawberry in the primary so mine hasn’t been an issue, yet. But with the combination of the bananas essentially melting, there is a large amount of krausen, or fermentation foam build up floating on top.

Filed Under: Mead Recipes

Brew Log: Lactomel (Milk Mead)

April 30, 2017 by The Mad AlcheMeadist

This was my first experimental mead. I read about a bunch of people attempting this on some forums. It sounded weird enough that I wanted to try it. You hear about milk and honey, like these things are eaten (drank?) together somewhere. So I gave it a shot, in about a two gallon batch.

Ingredients – Primary

  • 6 lbs of Clover honey
  • 1 Gallon Whole Milk
  • Lavlin 71B


I did not measure gravity.


The Lactomel turned out as weird as I expected it to. Part of the process actually had the milk curdle and produce a cheese like substance that floated on the top. The whey that did not curdle was added lactose to the drink, lending it a smooth, creamy feel and sweet taste. Since the yeast can’t eat lactose, this was safe from fermentation. I was unable to recover the curds, however, as I made this batch split between the two small glass formerly-apple-juice jugs. When removing everything, the curds got mixed with the lees from the fermentation and that was not an appetizing mixture. Some people have been able to make cheese from this, though. And since it’s been soaking in honey, it could be petty tasty.

Notes

The taste was quite odd. It is difficult to describe. I haven’t tried it since then after it completed about 8 months ago, so this was what it tasted like fresh. I’m hoping it has improved a bit through age. But it had a definite old milk flavor to it. The lactomel wasn’t bad, however. The flavor wasn’t off putting like you might have expected leaving milk out at room temperature during the fermentation. It was just strange. It was very silky, which was nice. But had a tangy aftertaste. I saw some people had put fruit flavoring in theirs as well, which might cover up some of that tang. But that is also something that could age out, as well.

I’m hoping it leaves behind a smooth, creamy light wine like flavor. I will have to see when I’m feeling adventurous enough to crack one of the bottles open again.


Filed Under: Mead Recipes

  • « Go to Previous Page
  • Go to page 1
  • Go to page 2
  • Go to page 3
  • Go to page 4
  • Go to Next Page »

Primary Sidebar

Recent Posts

  • Brew Log: Plum Mead
  • Banana Wine
  • Brew Log: Ginger Mead
  • Brew Log: Orange Blossom Honey Traditional
  • Hive & Barrel Meadery

Where To Find Mead

Meaderies by State

Tools

Brewing Calculators

Suggested Article

homebrew 3 piece airlock bubbling

How do I Make Mead? (Intermediate)

In the previous article, I walked through how the initial steps to create a mead. This was a single container process that got us to a drinkable state. If you found that enjoyable, but want to up your game a little for your next batch, I’ll go over some more advanced techniques to improve your […]

  • About
  • Disclaimer
  • Privacy Policy
  • Contact

Copyright © 2023 · HARU Theme on Genesis Framework · WordPress · Log in